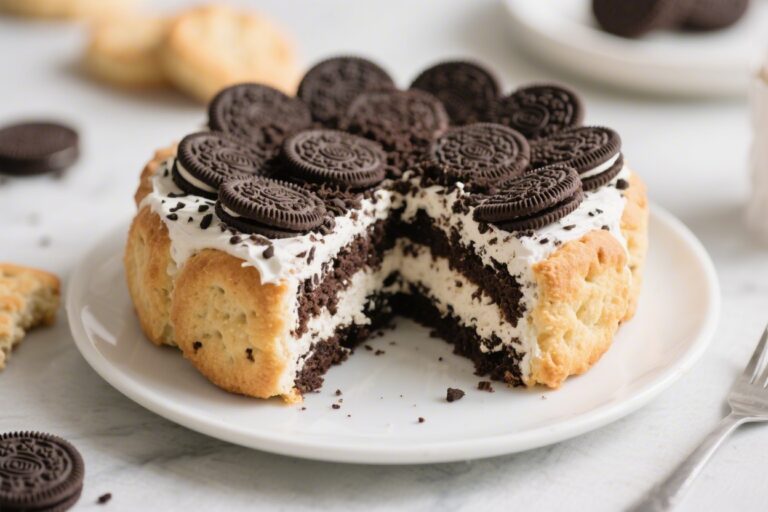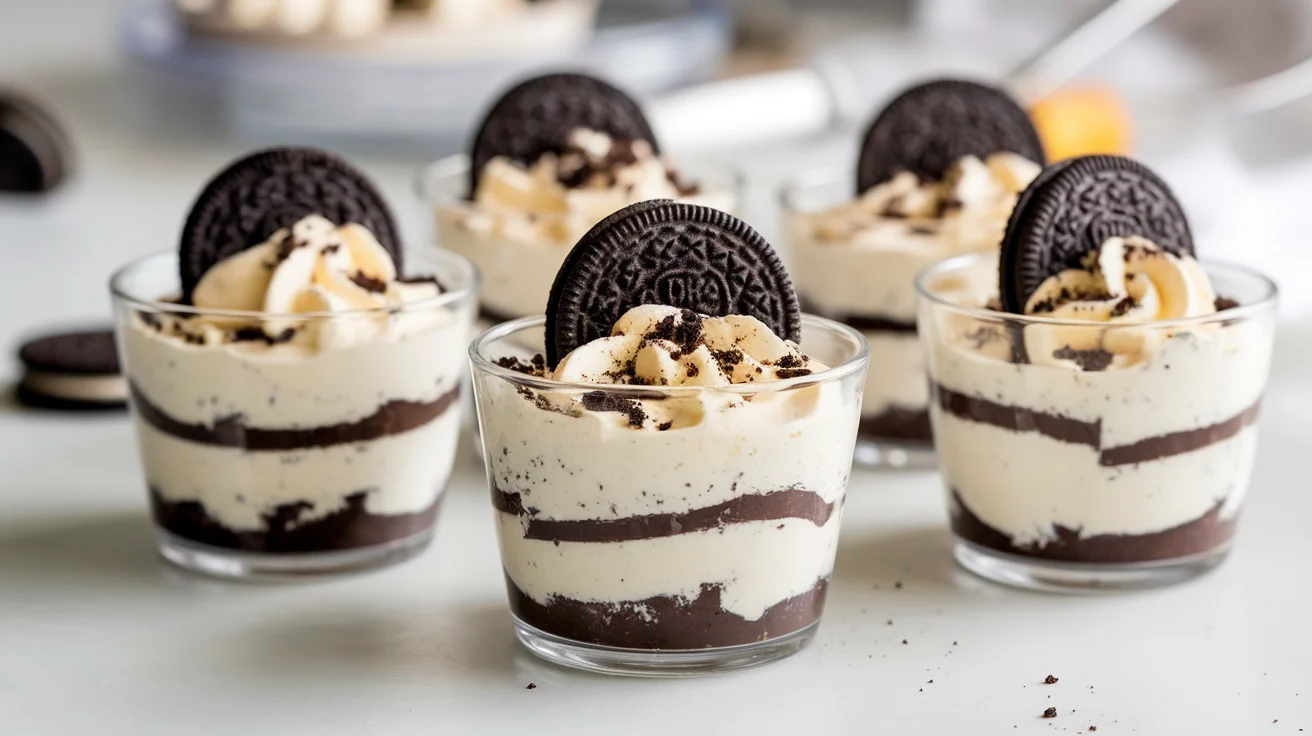
Silky Oreo Cheesecake Cups Without Baking
So you’re craving something rich, creamy, and chocolatey—but the thought of turning on the oven makes you reconsider all your life choices? Same.
These Silky Oreo Cheesecake Cups Without Baking are here to save the day. They’re smooth, chilled, and served in cute little cups that scream “I tried,” even though you absolutely did not break a sweat.
This is the dessert you make when you want cheesecake vibes without cheesecake commitment. No baking. No cracking. No stress. Just grab a spoon and prepare to be everyone’s favorite person.
Why This Recipe is Awesome
First of all, no baking. That alone deserves a standing ovation. Second, these are individual cups, which automatically makes them feel fancy—even if you ate one straight from the fridge at midnight.
They’re creamy, light, and packed with Oreo goodness in every layer. The texture is silky-smooth, not heavy or overly dense, so you don’t feel like you need a nap afterward (okay, maybe a small one).
Best part? They’re ridiculously easy. Idiot-proof easy. Even-on-a-bad-day easy.
Also, portion control. Not mandatory—but at least it pretends to exist.
Ingredients You’ll Need
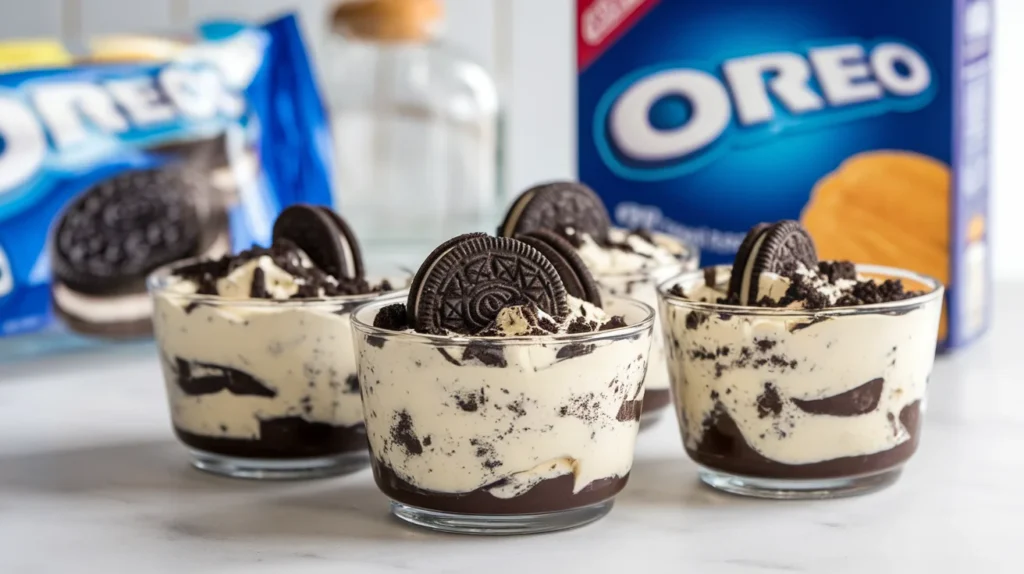
- Oreo cookies – Crushed. Cream filling stays. Non-negotiable.
- Melted butter – Helps the Oreo crumbs behave.
- Cream cheese (full-fat) – Softened. Lumps are the enemy.
- Powdered sugar – Smooth sweetness with zero grit.
- Vanilla extract – Small amount, big impact.
- Heavy whipping cream – Whipped to fluffy perfection.
- Extra crushed Oreos – For folding in and topping. Because obviously.
Simple ingredients. Maximum reward.
Step-by-Step Instructions
- Make the Oreo base.
Crush the Oreos into fine crumbs. Mix with melted butter until it looks like damp sand. Press a spoonful into the bottom of each serving cup and chill while you prep the filling. - Whip the cream.
Whip cold heavy cream until stiff peaks form. This gives the cheesecake its light, silky texture. Set it aside and try not to eat it with a spoon. - Mix the cheesecake base.
Beat softened cream cheese until smooth. Add powdered sugar and vanilla, then mix again until creamy and lump-free. This step matters—smooth now or regret later. - Fold like a gentle human.
Fold the whipped cream into the cream cheese mixture slowly. Don’t rush it. You’re building fluff, not fighting it. - Add Oreo magic.
Fold in crushed Oreos, leaving some chunks for texture. Too fine and it turns muddy. Balance is key. - Assemble the cups.
Spoon or pipe the cheesecake filling over the chilled Oreo bases. Smooth the tops or swirl them if you’re feeling artistic. - Chill and relax.
Refrigerate for at least 4 hours (overnight is even better). Top with extra Oreos before serving and accept compliments gracefully.
Nutritional facts
| Nutrient | Approx. Amount (per cup) |
|---|---|
| Calories | 290–320 kcal |
| Carbohydrates | 26 g |
| Protein | 5 g |
| Fat | 20 g |
| Saturated Fat | 12 g |
| Sugar | 17 g |
| Fiber | 1 g |
These cheesecake cups offer a satisfying mix of fats and carbs that make them incredibly filling. The dairy provides calcium and protein, which is a nice bonus for something this indulgent.
Personally, I love desserts like this because one cup feels just right—rich enough to satisfy, small enough to avoid regret. Balance, but make it dessert.
Common Mistakes to Avoid
- Using cold cream cheese. Lumps will ruin the silky vibe.
- Overmixing after adding whipped cream. Say goodbye to fluff.
- Skipping chill time. Warm cheesecake is not the goal here.
- Over-crushing the Oreos. You want texture, not Oreo dust.
- Filling cups too full immediately. Leave space for toppings—think ahead.
Alternatives & Substitutions
- No Oreos? Use chocolate graham crackers or sandwich cookies.
- Want it less sweet? Reduce powdered sugar slightly and add more crushed Oreos.
- Chocolate lover mode? Add a drizzle of chocolate ganache on top.
- Dairy-free version? Use dairy-free cream cheese and coconut whipped cream.
- Extra fancy? Add a layer of chocolate mousse or caramel sauce.
IMO, classic Oreos keep things nostalgic, but these cups are easy to customize. Just don’t replace cream cheese with yogurt. That’s not bravery—it’s chaos.
FAQ (Frequently Asked Questions)
Do these really taste like cheesecake?
Yes. Creamy, tangy, legit cheesecake flavor—minus the oven drama.
How long do they last in the fridge?
Up to 4 days, covered. Texture stays dreamy.
Can I freeze them?
Absolutely. Freeze, then thaw slightly for a semi-frozen treat.
Do I need piping bags?
Nope. A spoon works just fine. We’re not competing on a baking show.
Can I make these for a party?
Yes, and people will love the individual cups. Less mess, more wow.
Why isn’t my filling thick?
Your cream may not be whipped enough, or the mixture needs more chill time.
Final Thoughts
These Silky Oreo Cheesecake Cups Without Baking are proof that desserts don’t need to be complicated to be impressive. They’re smooth, indulgent, and ridiculously easy—basically everything a good dessert should be.
Make them for guests, celebrations, or just because your fridge deserves something special. Now go grab a spoon and show off your no-bake brilliance. You’ve earned it.
Printable Recipe Card
Want just the essential recipe details without scrolling through the article? Get our printable recipe card with just the ingredients and instructions.