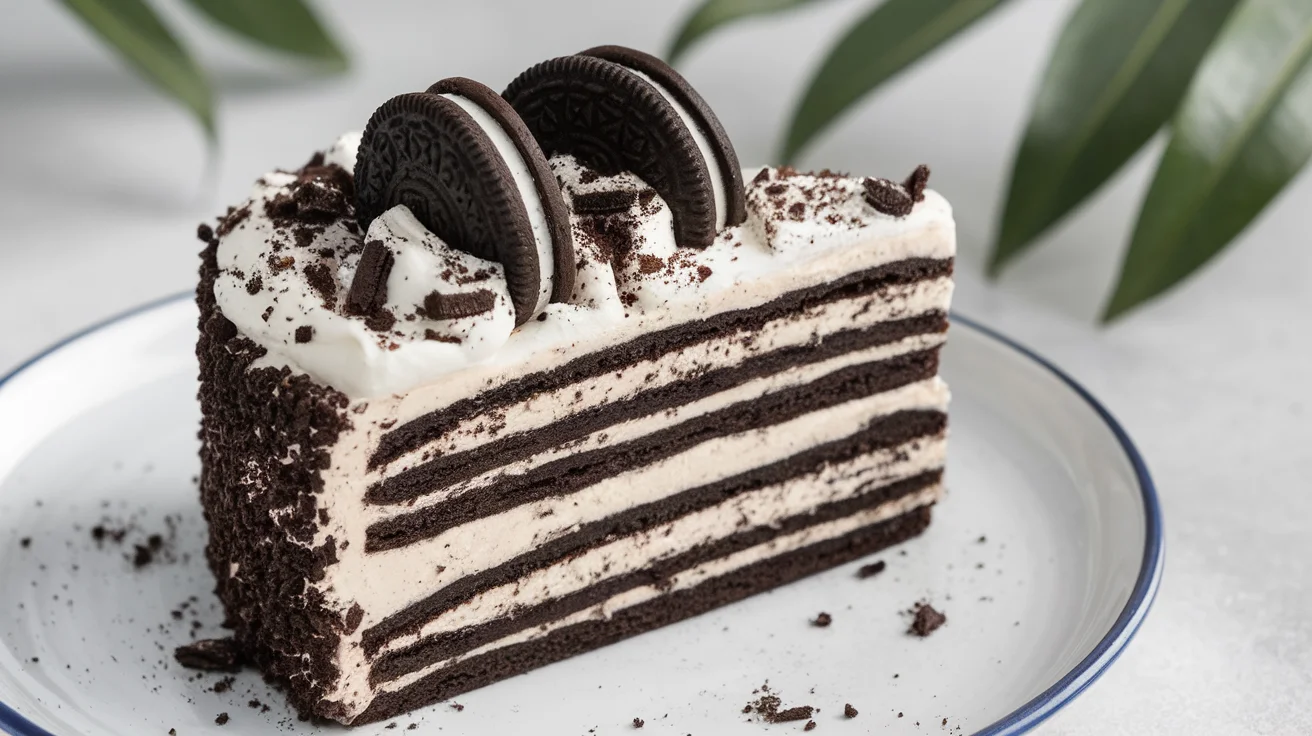
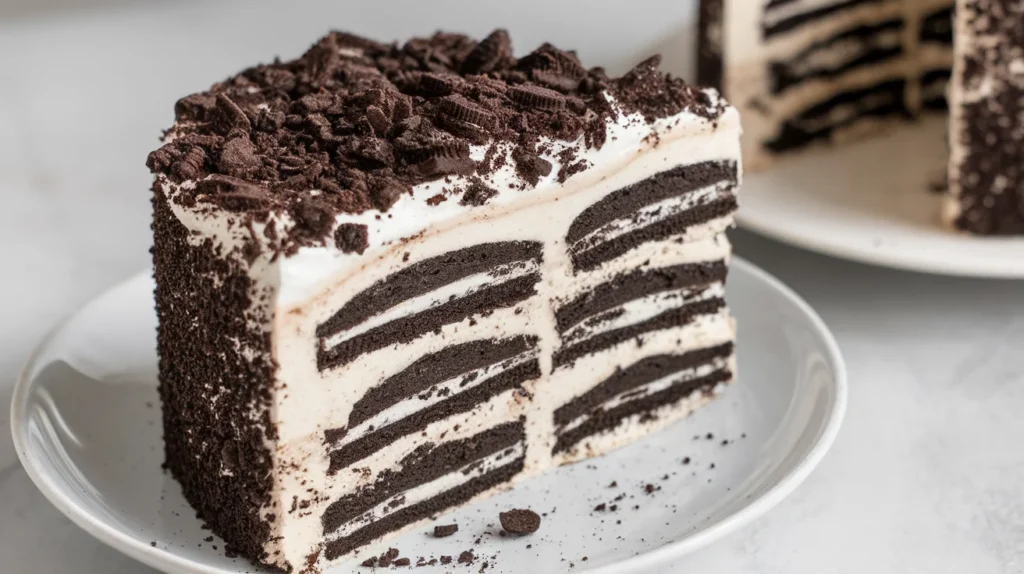
Easy Oreo Icebox Cake
So you’re craving something sweet, creamy, and chocolatey—but the idea of baking makes you want to lie down dramatically on the kitchen floor? Same.
This Easy Oreo Icebox Cake is the dessert equivalent of putting on sweatpants and still looking amazing. No oven. No mixer. No stress.
Just layers of Oreos and fluffy cream doing what they do best: making people very, very happy.
This is the kind of dessert you throw together “just to have something,” and suddenly everyone thinks you’re a genius. It’s lazy in the best way possible—and honestly, those are my favorite recipes.
Why This Recipe is Awesome
Let’s start with the obvious: three ingredients. That’s it. If a recipe needs more instructions than ingredients, I already don’t trust it. This one is basically foolproof—idiot-proof, even I didn’t mess it up levels of easy.
The fridge does all the work here. The Oreos soften into cake-like layers, the cream turns dreamy and thick, and somehow it all tastes like you spent way more effort than you actually did.
It’s cool, creamy, and perfect for hot days or last-minute guests.
Bonus points: kids love it, adults love it, and nobody complains that it’s “too rich” (which is code for “I ate too much”).
Ingredients You’ll Need
- Oreo cookies – Regular Oreos work best. Cream included. Always.
- Heavy whipping cream – Needs to be cold so it whips properly.
- Powdered sugar – Sweetens without graininess. Smooth vibes only.
- Vanilla extract – Optional, but it makes everything taste a little more grown-up.
That’s it. No eggs. No butter. No oven-induced panic.
Step-by-Step Instructions
- Whip the cream.
Pour cold heavy cream into a bowl and whip until soft peaks form. Add powdered sugar and vanilla, then whip again until stiff peaks appear. Stop once it’s fluffy—overwhipping turns it into butter, and that’s a different recipe. - Prep your dish.
Choose a loaf pan, square dish, or whatever you have. Line it with parchment if you want easy removal later. If not, no worries—it’ll still taste amazing. - Start layering.
Spread a thin layer of whipped cream on the bottom. Add a single layer of Oreos, breaking them as needed to fit. No perfection required here. - Repeat like a pro.
Add another layer of whipped cream, then Oreos. Keep going until you run out of ingredients, finishing with a generous layer of cream on top. - Chill out—literally.
Cover and refrigerate for at least 6 hours, but overnight is even better. This is when the magic happens. - Serve and accept compliments.
Slice, scoop, or dig in with a spoon. Top with crushed Oreos if you’re feeling fancy. You earned it.
Nutritional facts
| Nutrient | Approx. Amount (per slice) |
|---|---|
| Calories | 320–350 kcal |
| Carbohydrates | 30 g |
| Protein | 4 g |
| Fat | 22 g |
| Saturated Fat | 13 g |
| Sugar | 18 g |
| Fiber | 1 g |
This dessert isn’t trying to be healthy—and that’s okay. It delivers quick energy, serious comfort, and enough satisfaction that one slice usually does the trick. Personally, I love desserts like this because they encourage slowing down and actually enjoying the moment. Balance isn’t about restriction—it’s about enjoyment.
Common Mistakes to Avoid
- Not whipping the cream enough. Soft soup is not the goal. Stiff peaks matter.
- Rushing the chill time. If you cut it too early, it won’t hold layers. Patience, friend.
- Soaking the Oreos. Don’t dunk them. The fridge handles that part.
- Using low-fat cream. It won’t whip properly. This is not the time to cut corners.
- Uneven layers. Will it still taste good? Yes. Will it look messy? Also yes.
Alternatives & Substitutions
- Chocolate chip cookies instead of Oreos? Works, but you’ll miss the cream filling.
- Vanilla Oreos? Surprisingly good and a little less intense.
- Add-ins? Try sliced strawberries, peanut butter drizzle, or chocolate chips between layers.
- Dairy-free version? Use coconut whipped cream and dairy-free sandwich cookies.
- Extra indulgent? Add a thin layer of chocolate ganache. I fully support this lifestyle choice.
IMO, classic Oreos keep it nostalgic, but this recipe is basically a blank canvas. Go wild.
FAQ (Frequently Asked Questions)
Does this really turn into “cake”?
Yes! The Oreos soften and become cake-like. It’s fridge sorcery.
How long does it last in the fridge?
About 3–4 days, covered. Texture gets even better on day two.
Can I freeze Oreo icebox cake?
Yep. Freeze, then thaw slightly before serving. It’s like an ice cream cake’s chill cousin.
Do I need a mixer?
Not technically, but whisking by hand is a workout. Use a mixer if you value your arms.
Can I make this ahead of time?
Absolutely. It wants to be made ahead. Planning win.
Is it overly sweet?
Surprisingly no. The whipped cream balances the cookies nicely.
Final Thoughts
This Easy Oreo Icebox Cake is proof that simple desserts can still feel special. It’s low effort, high reward, and basically impossible to mess up. Whether you’re feeding a crowd or just your own sweet tooth, this one delivers every time.
Now go stack some Oreos, let the fridge do its thing, and impress someone—or yourself—with your no-bake brilliance. You’ve earned it.