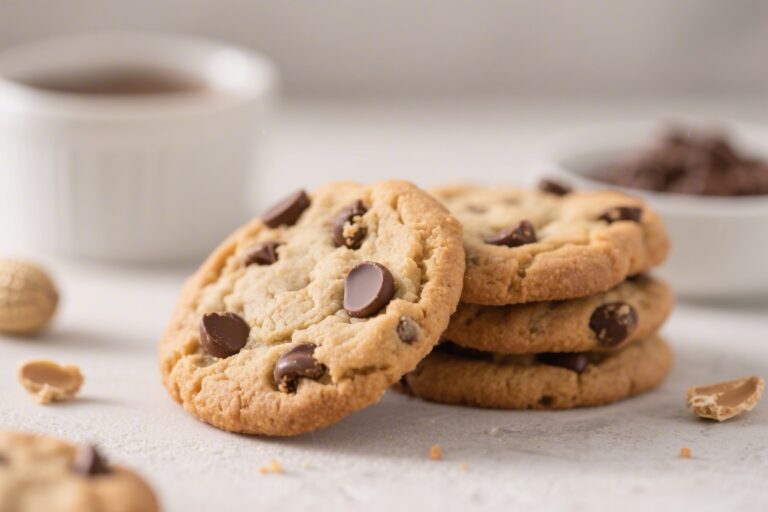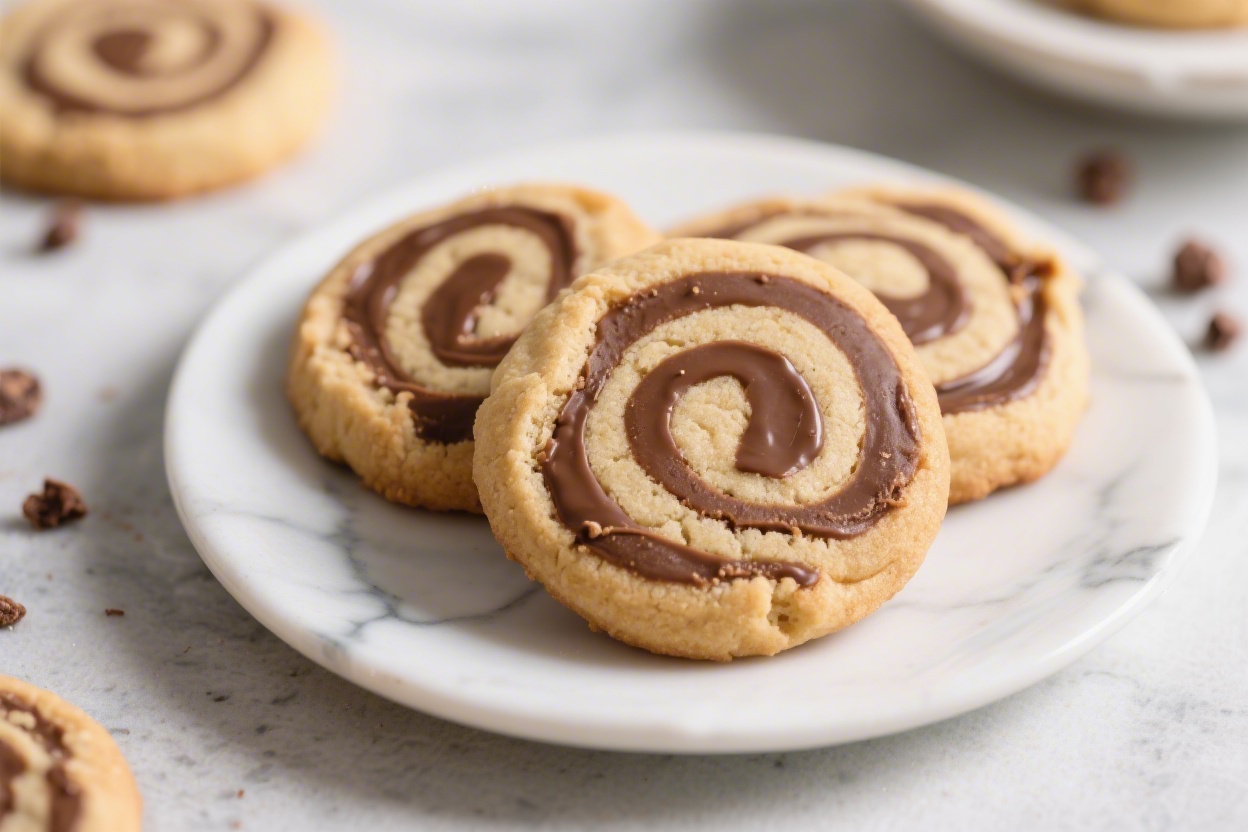
Easy Peanut Butter Chocolate Swirl Cookies for Beginners – Simple, Soft, and Satisfying
If you’re craving a warm, soft cookie that’s big on flavor but low on stress, these peanut butter chocolate swirl cookies are perfect for you. They’re beginner-friendly, use pantry staples, and look impressive thanks to the chocolatey marbled top. The texture hits that sweet spot between chewy and tender, with rich peanut butter balanced by smooth chocolate.
No fancy tools, no chilling for hours, and no tricky steps. Just mix, swirl, bake, and enjoy.
Easy Peanut Butter Chocolate Swirl Cookies for Beginners - Simple, Soft, and Satisfying
Ingredients
- Unsalted butter (softened) – 1/2 cup
- Creamy peanut butter – 3/4 cup (not natural/drippy; use a standard shelf-stable brand)
- Granulated sugar – 1/2 cup
- Light brown sugar – 1/2 cup, packed
- Large egg – 1
- Vanilla extract – 1 teaspoon
- All-purpose flour – 1 1/2 cups
- Baking soda – 1 teaspoon
- Fine salt – 1/4 teaspoon
- Semi-sweet chocolate chips or chunks – 3/4 cup
- Optional: Flaky sea salt for finishing
Instructions
- Preheat and prep: Set your oven to 350°F (175°C). Line two baking sheets with parchment paper for easy cleanup and even baking.
- Cream the fats and sugars: In a large bowl, beat softened butter, peanut butter, granulated sugar, and brown sugar until light and smooth, about 1–2 minutes. This step helps your cookies bake up soft and fluffy.
- Add egg and vanilla: Mix in the egg and vanilla extract until fully combined and glossy. Scrape the bowl to catch any streaks of peanut butter.
- Whisk dry ingredients: In a separate bowl, whisk together flour, baking soda, and salt. This keeps the leavening evenly distributed.
- Combine wet and dry: Add the dry mixture to the wet ingredients. Mix on low just until no dry flour remains. Do not overmix or the cookies can get tough.
- Melt the chocolate: In a microwave-safe bowl, heat the chocolate chips in 20–30 second bursts, stirring between each, until smooth. Let it cool for 2–3 minutes so it’s warm but not hot.
- Create the swirl: Dollop the melted chocolate over the cookie dough in 4–5 spoonfuls. Using a butter knife or spatula, gently fold the chocolate through the dough 2–3 times. Stop while you still see ribbons and streaks; if you mix too much, the dough will just turn brown.
- Portion the dough: Scoop 2-tablespoon mounds (a medium cookie scoop works great) and place them 2 inches apart on the baking sheets.
- Bake: Bake for 9–11 minutes, until the edges look set and the centers still look a touch soft. They’ll finish setting as they cool.
- Finish and cool: If you like, sprinkle a pinch of flaky sea salt on top right after baking. Let cookies cool on the sheet for 5 minutes, then transfer to a rack to finish cooling.
What Makes This Recipe So Good
- Beginner-proof technique: The dough comes together in one bowl, and the swirl is simple and forgiving.
- Balanced flavor: Creamy peanut butter plus melted chocolate gives you sweet, salty, and rich in every bite.
- Soft and chewy texture: A mix of brown and white sugar keeps the cookies moist and flavorful.
- No chill time: You can go from craving to cookie in under an hour.
- Great for gifting: The marbled tops look bakery-level with almost no extra effort.
Shopping List
- Unsalted butter (softened) – 1/2 cup
- Creamy peanut butter – 3/4 cup (not natural/drippy; use a standard shelf-stable brand)
- Granulated sugar – 1/2 cup
- Light brown sugar – 1/2 cup, packed
- Large egg – 1
- Vanilla extract – 1 teaspoon
- All-purpose flour – 1 1/2 cups
- Baking soda – 1 teaspoon
- Fine salt – 1/4 teaspoon
- Semi-sweet chocolate chips or chunks – 3/4 cup
- Optional: Flaky sea salt for finishing
Step-by-Step Instructions
- Preheat and prep: Set your oven to 350°F (175°C). Line two baking sheets with parchment paper for easy cleanup and even baking.
- Cream the fats and sugars: In a large bowl, beat softened butter, peanut butter, granulated sugar, and brown sugar until light and smooth, about 1–2 minutes.
This step helps your cookies bake up soft and fluffy.
- Add egg and vanilla: Mix in the egg and vanilla extract until fully combined and glossy. Scrape the bowl to catch any streaks of peanut butter.
- Whisk dry ingredients: In a separate bowl, whisk together flour, baking soda, and salt. This keeps the leavening evenly distributed.
- Combine wet and dry: Add the dry mixture to the wet ingredients.
Mix on low just until no dry flour remains. Do not overmix or the cookies can get tough.
- Melt the chocolate: In a microwave-safe bowl, heat the chocolate chips in 20–30 second bursts, stirring between each, until smooth. Let it cool for 2–3 minutes so it’s warm but not hot.
- Create the swirl: Dollop the melted chocolate over the cookie dough in 4–5 spoonfuls. Using a butter knife or spatula, gently fold the chocolate through the dough 2–3 times. Stop while you still see ribbons and streaks; if you mix too much, the dough will just turn brown.
- Portion the dough: Scoop 2-tablespoon mounds (a medium cookie scoop works great) and place them 2 inches apart on the baking sheets.
- Bake: Bake for 9–11 minutes, until the edges look set and the centers still look a touch soft.
They’ll finish setting as they cool.
- Finish and cool: If you like, sprinkle a pinch of flaky sea salt on top right after baking. Let cookies cool on the sheet for 5 minutes, then transfer to a rack to finish cooling.
Keeping It Fresh
These cookies stay soft for days if stored properly. Keep them in an airtight container at room temperature for up to 4 days.
Slip in a small slice of sandwich bread to help maintain moisture—the cookies absorb humidity, not the bread.
For longer storage, freeze baked cookies in a zip-top bag for up to 2 months. Thaw at room temperature or warm in a 300°F (150°C) oven for 5 minutes. You can also freeze the dough balls: freeze on a tray until firm, then bag them.
Bake from frozen, adding 1–2 extra minutes.
Health Benefits
While these are treats, there are a few positives worth noting. Peanut butter provides plant-based protein and healthy fats, which help with satiety and steady energy. A small amount of dark or semi-sweet chocolate offers antioxidants like flavanols.
You can also make small tweaks for a lighter option.
Swap some flour for white whole wheat, or reduce the sugar slightly without losing texture. Using a natural peanut butter that’s stabilized but lower in added sugar can also help balance the sweetness.
Pitfalls to Watch Out For
- Overmixing the dough: Too much stirring after adding flour leads to tough cookies. Mix just until combined.
- Over-swirling the chocolate: Two or three folds is plenty.
You want visible ribbons, not a uniform chocolate dough.
- Using oily natural peanut butter: Very runny, unstabilized peanut butter can make the cookies greasy and flat. Choose a standard creamy variety.
- Overbaking: Pull them when edges set and centers still look soft. They firm up as they cool.
- Hot chocolate addition: If the melted chocolate is too hot, it can melt the dough.
Let it cool slightly before swirling.
Recipe Variations
- Double chocolate swirl: Add 2 tablespoons unsweetened cocoa powder to the dry ingredients for a darker, richer cookie base.
- Crunchy peanut twist: Use crunchy peanut butter or stir in 1/3 cup chopped roasted peanuts for texture.
- Peanut butter cup bits: Fold in 1/2 cup chopped peanut butter cups along with the swirl for extra indulgence.
- Gluten-free version: Use a 1:1 gluten-free baking flour with xanthan gum. Check chocolate labels to confirm they’re gluten-free.
- Smaller cookies: Scoop 1 tablespoon portions and bake 7–9 minutes for bite-sized treats perfect for parties.
- Salted caramel drizzle: After cooling, drizzle with warm salted caramel and a pinch of flaky salt.
FAQ
Can I use natural peanut butter?
You can, but choose a thicker, stabilized natural peanut butter that doesn’t separate as much. Stir it well and expect slightly flatter cookies.
Avoid very runny, oily brands for best results.
What if I don’t have chocolate chips?
Chop up a chocolate bar or use chocolate melting wafers. Semi-sweet or dark works best, but milk chocolate is fine if you prefer a sweeter cookie.
Do I need to chill the dough?
No. This recipe is designed for no-chill baking.
If your kitchen is very warm, a quick 15-minute chill can help the cookies hold their shape.
How do I make the swirl look prettier?
Add the melted chocolate in several dollops and fold gently with a butter knife. Stop early, then, after scooping, lightly touch the tops with a bit more melted chocolate and swirl once for a clean marbled finish.
Why are my cookies dry or crumbly?
This usually happens from too much flour or overbaking. Spoon and level your flour (don’t pack it), and pull the cookies when the centers still look slightly soft.
Can I make them dairy-free?
Yes.
Use a dairy-free butter substitute and dairy-free chocolate. Check labels to ensure they’re suitable for your needs. Texture will be similar, though slightly less rich.
How big should the cookies be?
Two tablespoons of dough per cookie gives a nice bakery-style size.
For smaller cookies, use one tablespoon and reduce the bake time by 1–2 minutes.
Can I add oats?
Yes. Replace 1/2 cup of flour with 1/2 cup quick oats for a heartier texture. The cookies will be slightly thicker and chewier.
Final Thoughts
These peanut butter chocolate swirl cookies are the kind of recipe you’ll keep coming back to—easy steps, simple ingredients, and a result that looks and tastes special.
The swirl adds just enough wow without adding work, and the soft, chewy centers make them hard to resist. Whether you’re new to baking or just want a reliable, crowd-pleasing treat, this recipe delivers every time. Make a batch today, and you might find they barely make it to the cooling rack.
Printable Recipe Card
Want just the essential recipe details without scrolling through the article? Get our printable recipe card with just the ingredients and instructions.