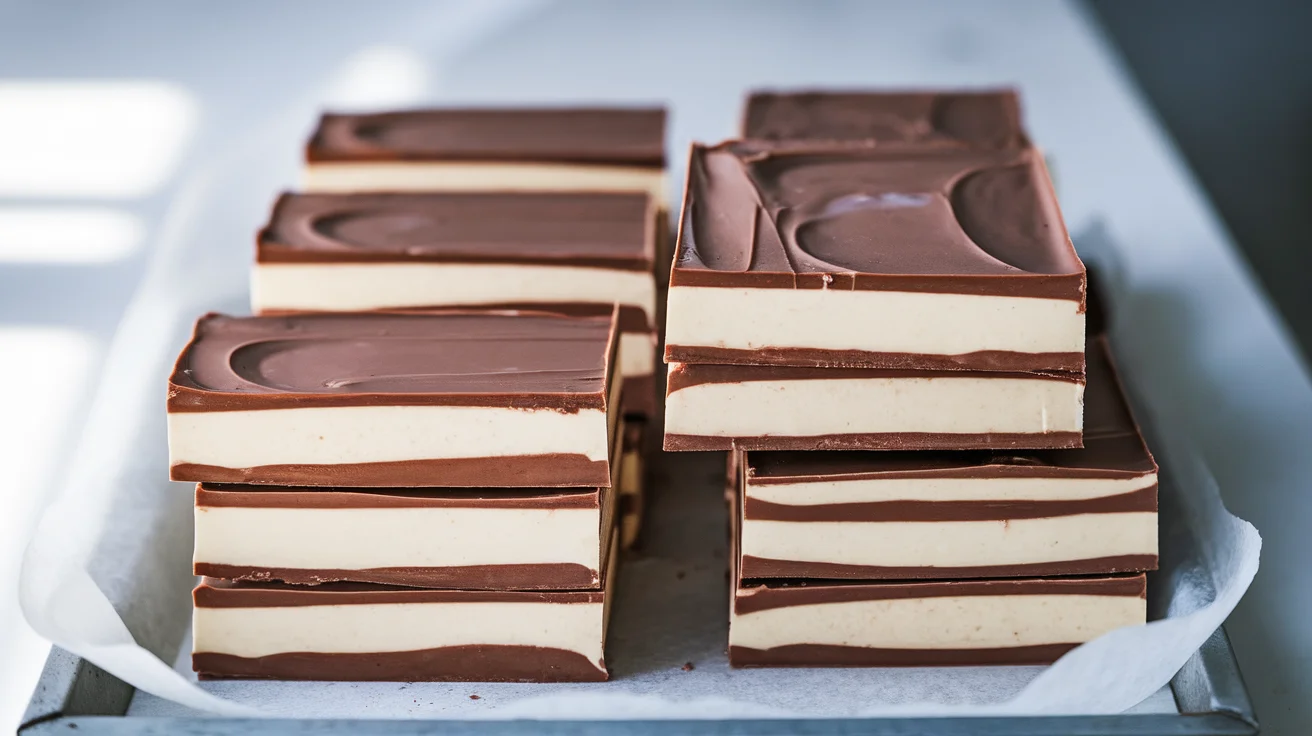
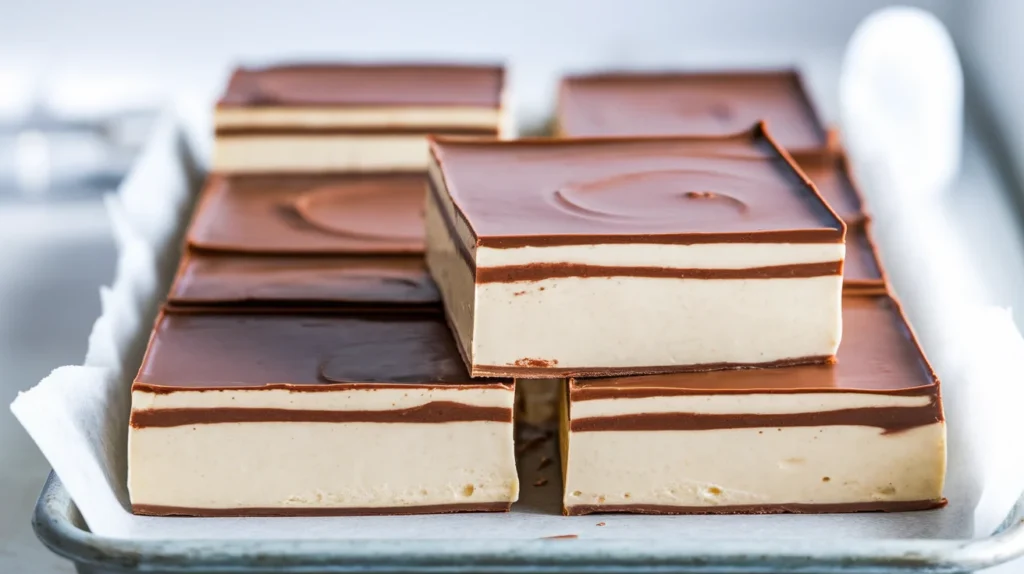
No-Churn Chocolate Vanilla Ice Cream Bars with a Smooth Finish
So you’re craving something cold, creamy, chocolatey, and deeply satisfying—but the thought of dragging out an ice cream machine makes you want to lie down dramatically on the kitchen floor?
Same. These No-Churn Chocolate Vanilla Ice Cream Bars with a Smooth Finish are here to save your sanity and your dessert cravings.
No fancy equipment, no babysitting, no churn-induced stress. Just layered chocolate-vanilla goodness that looks store-bought and tastes like you definitely paid too much for it (but didn’t).
Why This Recipe Is Awesome
Let’s start with the obvious: no ice cream machine required. That alone deserves a slow clap.
This recipe is basically foolproof—even I didn’t mess it up, and I’ve absolutely forgotten to freeze things before. The chocolate and vanilla layers play nicely together like they’ve known each other since kindergarten. Plus, turning it into bars makes portioning easy… in theory.
Also, they’re ridiculously smooth and creamy thanks to whipped cream and sweetened condensed milk doing all the heavy lifting. Minimal effort, maximum reward. IMO, that’s the dream.
Ingredients You’ll Need
For the Vanilla Layer:
- 2 cups heavy whipping cream – cold, like your ex’s heart
- ½ cup sweetened condensed milk – sweet, sticky, magical
- 1½ tsp vanilla extract – don’t skimp; vanilla is the vibe
For the Chocolate Layer:
- 2 cups heavy whipping cream – yes, again
- ½ cup sweetened condensed milk – still magical
- ¼ cup cocoa powder – unsweetened, because balance
- 2 tbsp melted dark chocolate (optional) – for extra drama
Optional Extras (Because Why Not):
- Chocolate chips or shavings
- Crushed cookies or biscuit crumbs
- A pinch of sea salt – trust me
Step-by-Step Instructions
- Prep your pan like a pro.
Line a loaf pan or square pan with parchment paper, leaving overhang on the sides. This makes removal easy and saves future-you from rage. Set it aside and feel accomplished. - Whip the cream for the vanilla layer.
In a chilled bowl, whip the heavy cream until soft peaks form. Don’t walk away—cream goes from fluffy to butter faster than you think. You want light and airy, not spreadable. - Sweeten and flavor the vanilla.
Gently fold in the condensed milk and vanilla extract. Use a spatula and a light hand. Overmixing kills the fluff, and fluff is the whole point here. - Spread the vanilla layer.
Pour the vanilla mixture into the prepared pan and smooth the top. Tap the pan gently to release air bubbles. Pop it into the freezer while you prep the chocolate layer. - Repeat the whipping process for chocolate.
Whip the cream again until soft peaks form. Sift in the cocoa powder (unless you like lumps—no judgment). Add condensed milk and melted chocolate if using. - Fold gently, always.
Fold until everything looks evenly chocolatey and smooth. Taste it. You have to. It’s science. - Layer it up.
Spoon the chocolate mixture over the frozen vanilla layer. Smooth the top like you’re frosting a cake on a baking show. Add any toppings now if you’re feeling fancy. - Freeze until solid.
Cover and freeze for at least 6 hours, preferably overnight. Patience is annoying but necessary here. - Slice into bars and serve.
Lift the ice cream out using the parchment, slice into bars, and enjoy your extremely smooth creation. Congrats—you made ice cream without churning or crying.
Nutritional Facts
| Nutrient (per bar) | Approx. Value |
|---|---|
| Calories | 220 kcal |
| Carbohydrates | 20 g |
| Protein | 3 g |
| Fat | 14 g |
| Sugar | 17 g |
These ice cream bars deliver quick energy thanks to carbs and fats, making them perfect for a treat-day dessert. The dairy provides calcium and a bit of protein, so it’s not entirely indulgent. Personally, I think homemade desserts like this are a win—you control the ingredients and the portions (even if you ignore the portion size). Balance, right?
Common Mistakes to Avoid
- Not whipping the cream enough. Soft peaks matter—liquid soup does not freeze well.
- Overmixing after adding condensed milk. You’ll deflate the cream and lose that silky texture.
- Skipping parchment paper. Enjoy chiseling ice cream out of a pan like an archaeologist.
- Freezing for “just a couple hours.” Rookie mistake. It needs time.
Alternatives & Substitutions
- Want it dairy-free? Use coconut cream and condensed coconut milk—works great and tastes amazing.
- Not into chocolate? Swap cocoa for strawberry purée or caramel sauce.
- Need crunch? Add nuts, granola, or cookie crumbs between layers.
- Watching sugar? Use a reduced-sugar condensed milk, but FYI, texture may change slightly.
FAQ (Frequently Asked Questions)
Do I really not need an ice cream machine?
Correct. Your freezer is doing all the work. Lazy wins.
Can I make this in popsicle molds?
Absolutely—and honestly, that’s a great idea.
Why isn’t my ice cream creamy?
You probably overmixed or underwhipped the cream. Be gentle next time.
Can I use milk instead of cream?
Technically yes, but it won’t be creamy. And creamy is the whole point.
How long does it last in the freezer?
Up to 2 weeks if well-covered—if it survives that long.
Can I add swirls instead of layers?
Yes! Swirl away and live your artistic truth.
Final Thoughts
These No-Churn Chocolate Vanilla Ice Cream Bars with a Smooth Finish prove that homemade ice cream doesn’t have to be complicated—or involve expensive gadgets.
They’re creamy, customizable, and dangerously easy to make. Whether you’re impressing guests or just treating yourself after a long day, this recipe delivers. Now go grab a bar… or two. You’ve earned it. 🍫🍦